7 Best Ways to Solve Automotive Lighting Challenges?

Time:2026-09-23 Author:Ethan
0%

Automotive lighting is no longer only about making a vehicle visible at night. It shapes safety, styling, driver confidence, and brand identity. A headlamp must produce a controlled beam while surviving vibration, heat, rain, road salt, and repeated thermal changes. Small defects can become serious problems. A cloudy lens, uneven LED brightness, or loose connector may appear after thousands of operating hours.

So, what are the challenges in automotive lighting manufacturing? Manufacturers often face complex optical alignment, heat management, moisture sealing, component consistency, and strict quality validation. LED modules can create concentrated heat near sensitive electronic parts. Condensation may form inside a lamp after a cold-night drive. Assembly errors can shift the beam pattern by only a few millimeters, yet affect road visibility. These details demand disciplined processes, capable suppliers, and testing based on real driving conditions.

Experience matters here. Engineers can combine photometric testing, thermal cycling, vibration trials, ingress checks, and end-of-line inspection to identify weak points earlier. Reliable production also depends on traceable materials, calibrated equipment, and documented corrective actions. Still, no factory is perfect. A successful design may fail when production volume rises, or when a supplier changes a small component. That reality deserves attention. The seven approaches in this guide focus on practical improvements, from stronger design validation to smarter automation and continuous quality review. Small changes can prevent expensive failures. Good lighting begins with careful thinking.
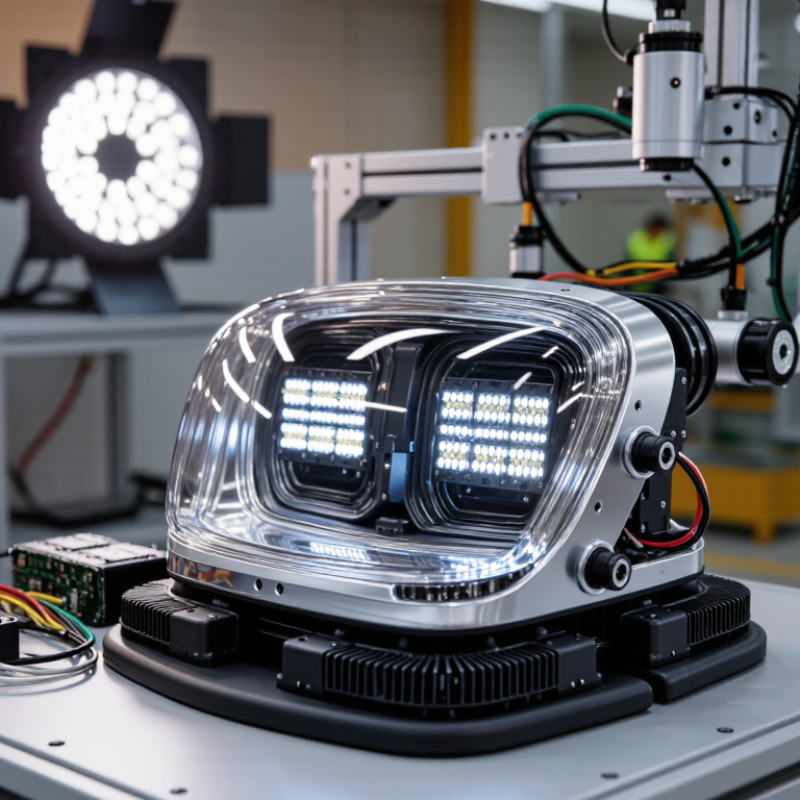
7 Best Ways to Solve Automotive Lighting Challenges?

Understanding the Main Challenges in Automotive Lighting Systems

Automotive lighting is no longer a simple visibility feature. It must support safety, energy efficiency, comfort, and intelligent driving. NHTSA recorded 7,522 pedestrian deaths in the United States in 2022, highlighting the need for clearer vehicle visibility. Engineers should begin with three actions: map lighting risks, improve beam accuracy, and protect optical surfaces from dust, moisture, and aging.

Adaptive lighting can reduce glare while keeping road edges visible. However, poor calibration may create dangerous blind zones. UNECE Regulation No. 123 addresses adaptive front-lighting systems, showing why testing must cover real traffic conditions. Use sensors with fail-safe logic. Add thermal monitoring. Validate performance during rain, fog, vibration, and sudden voltage changes. Laboratory results alone can mislead.

LEDs also create thermal challenges. The U.S. Department of Energy reports that LEDs can use at least 75% less energy than incandescent lighting, but efficiency depends on heat management. Use compact heat paths, stable drivers, and diagnostic alerts. Inspect connectors regularly. Verify software updates after repairs. Standardize photometric testing across production batches. Field inspections often reveal a simple truth: a clean lens can matter more than a brighter lamp. This is not a perfect fix. Human reaction, road design, and weather still shape lighting performance. Testing should therefore include imperfect conditions, not only ideal demonstrations.

Diagnosing Common Electrical, Optical, and Thermal Lighting Problems

Automotive lighting problems often begin with small clues: a flickering beam, a dark corner, or a warm connector. Diagnose electrical faults with a multimeter before replacing parts. Check battery voltage, fuse continuity, ground resistance, and connector corrosion. A poor ground can imitate a failed lamp. Inspect wiring for crushed insulation and loose terminals.

Optical issues need a different approach. Clean the lens, inspect moisture, and verify beam alignment against a flat wall. Uneven light may result from a damaged reflector or incorrect seating. Thermal problems also matter. Measure housing temperature after a normal drive, then check blocked vents, weak heat transfer, and overloaded circuits. Seven practical methods help: scan voltage, test grounds, inspect connectors, verify load, clean lenses, aim beams, and record heat during a road test. One mistake is blaming the lamp too early. The real fault may sit several centimeters away.

Tips: Photograph wiring before removal. Use insulated probes and follow service specifications. Replace damaged seals, not just visible bulbs. Let hot housings cool before inspection. If readings conflict, repeat the test under operating conditions. A quick bench check can miss vibration, moisture, and temperature changes. Keep a simple fault log with voltage, temperature, symptoms, and repair results.

Selecting the Right Automotive Lighting Technologies and Components

Choosing the right automotive lighting technology starts with the vehicle’s real operating conditions. LED systems often provide efficient output, compact packaging, and flexible styling. However, brightness alone is not enough. Examine beam distribution, color stability, response time, and energy demand before selecting a light source.

The optical component deserves equal attention. A precise lens, reflector, or light guide can reduce glare and improve road visibility. Test the design in rain, dust, vibration, and rapid temperature changes.

Thermal management matters too. Poor heat dissipation can shorten LED life and shift color over time.

Select connectors, seals, and wiring that match the expected voltage and environmental exposure. Small failures often begin at these interfaces.

Control electronics should support diagnostics, dimming, and stable communication with the vehicle system. Confirm electromagnetic compatibility through documented testing, not assumptions.

Review photometric data from controlled measurements, then compare it with night-driving trials. Check applicable lighting regulations for each sales region.

A first prototype may look impressive but still create uneven illumination on curved roads. That weakness needs honest review.

Component traceability, consistent suppliers, and lifecycle testing also strengthen reliability. In practice, the best solution balances optical performance, thermal behavior, installation space, serviceability, and long-term cost.

Applying Installation and Calibration Methods for Reliable Performance

7 Best Ways to Solve Automotive Lighting Challenges?

Applying Installation and Calibration Methods for Reliable Performance

Reliable automotive lighting starts with careful installation, not brighter bulbs. Inspect connectors, wiring, seals, and mounting points before fitting any lamp. Clean contact surfaces. Confirm the housing sits level and remains secure after tightening. Use the specified torque whenever possible. Over-tightening can distort the housing and create future leaks.

Aim the beam on a flat, dark surface with the vehicle unloaded. Check height, angle, and left-right balance. Use a calibrated light meter when available. Then calibrate adaptive sensors after suspension, bumper, or windshield work. A small sensor error can move the beam several metres at night. Test low beam, high beam, indicators, brake lamps, and automatic functions separately. Road testing should happen in a safe, controlled area. I once trusted a visual check and missed a slight beam tilt. That mistake was embarrassing, but useful.

Tips: Mark the original lamp position before removal. Photograph connector locations. Keep lenses free from fingerprints. Recheck alignment after a short drive. Do not rely only on dashboard warnings. Some faults remain quiet. If results seem inconsistent, pause and inspect the basics again. A second technician can notice what tired eyes miss. Calibration may feel repetitive, but it protects visibility, comfort, and dependable performance.

7 Best Ways to Solve Automotive Lighting Challenges? - Applying Installation and Calibration Methods for Reliable Performance

No. Common Challenge Recommended Installation or Calibration Method Critical Parameters Verification Procedure Typical Result Recommended Frequency
1 Uneven beam aim or excessive glare Level the vehicle on a flat surface, set the specified tire pressure and fuel/load condition, then align the headlamps against a calibrated aiming screen. Vehicle ride height, lamp centerline, vertical aim, horizontal aim, and the applicable low-beam cutoff target. Check the cutoff pattern at the prescribed test distance and confirm that both lamps are symmetrical and within the applicable regulatory limits. More uniform road illumination with reduced glare risk. After suspension or tire work, lamp replacement, or an impact; otherwise during scheduled inspection.
2 Condensation and water ingress Inspect housing seals, vents, connectors and lens joints. Replace damaged seals, restore vent paths and apply only approved sealing methods. Seal condition, vent cleanliness, connector locking, drain paths and evidence of standing water. Perform a visual inspection after a controlled water exposure and check for moisture accumulation, electrical faults or repeated fogging. Improved optical clarity and lower corrosion or short-circuit risk. At every lamp service and after pressure washing, flooding or collision damage.
3 Flicker, dimming or intermittent operation Test the complete power and ground circuit under load. Check connectors, fuses, control modules, wiring resistance and charging-system output. Supply voltage, voltage drop, ground integrity, connector fit, thermal condition and diagnostic trouble codes. Measure voltage at the lamp while operating and compare it with the vehicle service specification; perform a wiggle test on suspect wiring. Stable light output and fewer nuisance fault warnings. Whenever symptoms occur and after electrical repairs or connector replacement.
4 Incorrect adaptive-lighting or leveling behavior Inspect ride-height and steering-angle sensors, confirm mechanical linkage alignment, then perform electronic zero-point calibration with a suitable diagnostic tool. Sensor position, steering-wheel center, ride height, calibration status and stored diagnostic codes. Verify the static initialization and conduct a controlled road or workshop function test according to the service procedure. Correct beam response during braking, acceleration, cornering and load changes. After alignment, suspension work, sensor replacement or an instrument-panel warning.
5 Reduced light output from lens aging Clean the lens with compatible materials, assess yellowing, pitting and internal reflector damage, then restore or replace components when cleaning is insufficient. Lens transparency, surface damage, reflector condition, bulb or LED module performance and beam distribution. Compare the beam pattern and measured intensity before and after service using the same test position and equipment. Improved optical transmission without changing the approved light source. Inspect annually or whenever nighttime visibility noticeably declines.
6 Poor thermal management and premature component failure Confirm heat sinks, cooling fans, thermal interfaces and airflow paths are correctly installed and free from contamination or obstruction. Heat-sink contact, fan operation, ambient temperature, airflow clearance and thermal protection events. Operate the lighting system until stabilized, monitor thermal behavior with approved equipment and inspect for output reduction or shutdown. More consistent output and improved component service life. During installation, routine service and whenever thermal warnings or output cycling appear.
7 Non-compliant modifications or incompatible replacement parts Use components with the correct electrical rating, optical design and approval status. Avoid unauthorized wiring changes and verify compatibility before installation. Rated voltage, power consumption, connector configuration, electromagnetic compatibility and legal approval requirements. Check installation documentation, inspect beam shape and warning indicators, and confirm operation of all required lighting functions. Reliable operation with lower regulatory, glare and electrical-system risk. Before every replacement or modification and during periodic vehicle inspection.

Note: Final aiming values, load conditions, test distances and approval requirements should always follow the vehicle service information and the regulations applicable in the operating region.

Maintaining and Testing Vehicle Lighting Systems for Long-Term Safety

Automotive lighting problems often begin with small details: a cloudy lens, loose connector, or weak ground. In workshop inspections, I check headlights, brake lamps, indicators, hazard lamps, and reverse lights together. A single failed bulb can hide a wider electrical fault. I inspect the lens for cracks, moisture, and yellowing. Then I clean it with a suitable plastic-safe product. Do not polish blindly; excessive abrasion can damage the surface.

Testing should be practical and repeatable. I measure battery voltage before starting, then test each lamp with the engine running. Flickering usually deserves closer attention. It may point to corrosion, poor grounding, or unstable wiring. I also verify beam alignment on level ground, because bright light aimed incorrectly can reduce visibility for everyone. Local roadworthiness rules should guide final adjustments.

Replacement work needs care. Use the correct bulb specification and avoid touching hot glass with bare fingers. After installation, I check connectors for heat marks and confirm that seals sit evenly. I record the date, symptom, and repair, which helps reveal repeated failures. My early mistake was trusting a quick visual check; a lamp can work in daylight but fail under vibration or rain. That is why a short night test and a second inspection are worth the extra minutes. Keep it documented.

FAQS

Why is automotive lighting important beyond basic visibility?

It supports road safety, energy efficiency, comfort, and intelligent driving. Clear lighting helps drivers notice pedestrians, curves, and road edges. Visibility is never perfect.

What can go wrong with adaptive lighting systems?

Poor calibration may create blind zones or direct glare toward other drivers. Test sensors and fail-safe controls during rain, fog, vibration, and voltage changes. Real traffic exposes weaknesses.

How should engineers test lighting performance?

Combine laboratory measurements with night-driving trials. Check beam alignment, curved roads, sudden weather changes, and uneven surfaces. Ideal demonstrations can mislead.

Why does heat management matter for LED lighting?

Excessive heat can shorten LED life and shift color over time. Use stable drivers, compact heat paths, and thermal monitoring. Heat quietly damages performance.

Which components deserve careful selection?

Examine lenses, reflectors, light guides, connectors, seals, wiring, and control electronics. Match them to expected voltage, dust, moisture, vibration, and temperature changes. Small interfaces can cause large failures.

Is brighter lighting always better?

No. Beam distribution, glare control, color stability, and response time matter more than brightness alone. A clean lens may improve visibility more effectively than a brighter lamp.

How can vehicle lighting be maintained?

Inspect headlights, brake lamps, indicators, hazard lamps, and reverse lights together. Look for cracks, moisture, yellowing, loose connectors, and weak grounding. Clean lenses with plastic-safe products.

What should be checked after replacing a lamp?

Confirm the correct specification and avoid touching hot glass with bare fingers. Check connectors for heat marks and seals for even seating. Test the lamp at night.

What does flickering lighting usually indicate?

Flickering may suggest corrosion, poor grounding, unstable wiring, or a broader electrical fault. Measure battery voltage with the engine running. A quick visual check is not enough.

Conclusion

Automotive lighting systems must deliver consistent visibility, accurate signaling, energy efficiency, and reliable operation under changing road and weather conditions. This overview explains what are the challenges in automotive lighting manufacturing, including electrical instability, optical misalignment, heat buildup, vibration, moisture, and limited installation space. It also describes how to diagnose common lighting problems by checking power supply, wiring, connections, beam patterns, component temperature, and control signals.

The article presents practical methods for selecting suitable lighting technologies and components according to vehicle requirements, operating conditions, and safety objectives. It also covers correct installation, aiming, calibration, sealing, and connector protection to support dependable performance. Finally, regular inspections, cleaning, testing, and preventive maintenance are highlighted as essential steps for identifying failures early, preserving light output, and improving long-term driving safety.

Ethan

Ethan

Ethan is a seasoned marketing professional with a deep expertise in our company's innovative product line. With a passion for sharing knowledge and insights, he takes the lead in regularly updating our corporate blog, where he explores industry trends, product features, and effective marketing......